SDD 07 - OpenSpec: Quick & Dirty Starter Guide
SDD Learning · Previous: Spec Kit lab route · Next: OpenSpec lab route
OpenSpec is especially useful when the question is: what does this system currently promise, and exactly how does this change alter that promise? Its practical distinction is the separation between current specifications and proposed changes.
The agent works on a named change containing the proposal, requirement deltas, design and tasks. When the change is accepted, the deltas are incorporated into the current specifications and the change is archived. That gives the next session something more reliable than an old chat transcript.
Quick start
You need Node.js 20.19.0 or newer and a supported AI coding assistant. The OpenSpec repository lists installation options; these examples use npm in a user-managed Node.js installation.
Run in the terminal:
$ npm install -g @fission-ai/openspec@latest
$ openspec --version
Navigate to the repository you want to work on, then initialize:
$ openspec initSelect your coding tool. Start or reload the assistant in that repository so it discovers the generated instructions. Initialization configures the workflow; it does not implement your feature.
Use openspec ... in the terminal. Use /opsx:... in the agent's chat. Some integrations expose skills differently, so check the generated catalog rather than assuming all assistants have identical slash-command behavior.
Two directories explain most of OpenSpec
| Location | Meaning |
|---|---|
openspec/specs/ | The maintained specification of current behavior |
openspec/changes/<change>/ | One proposed change and its working artifacts |
openspec/changes/<change>/specs/ | The requirements that this change adds, modifies or removes |
openspec/changes/archive/ | Historical change packages |
openspec/config.yaml | Project context and workflow configuration |
The useful distinction is between a baseline and a delta. A proposal that says “add JSON” can remain small because it does not need to restate every behavior of the existing CLI.
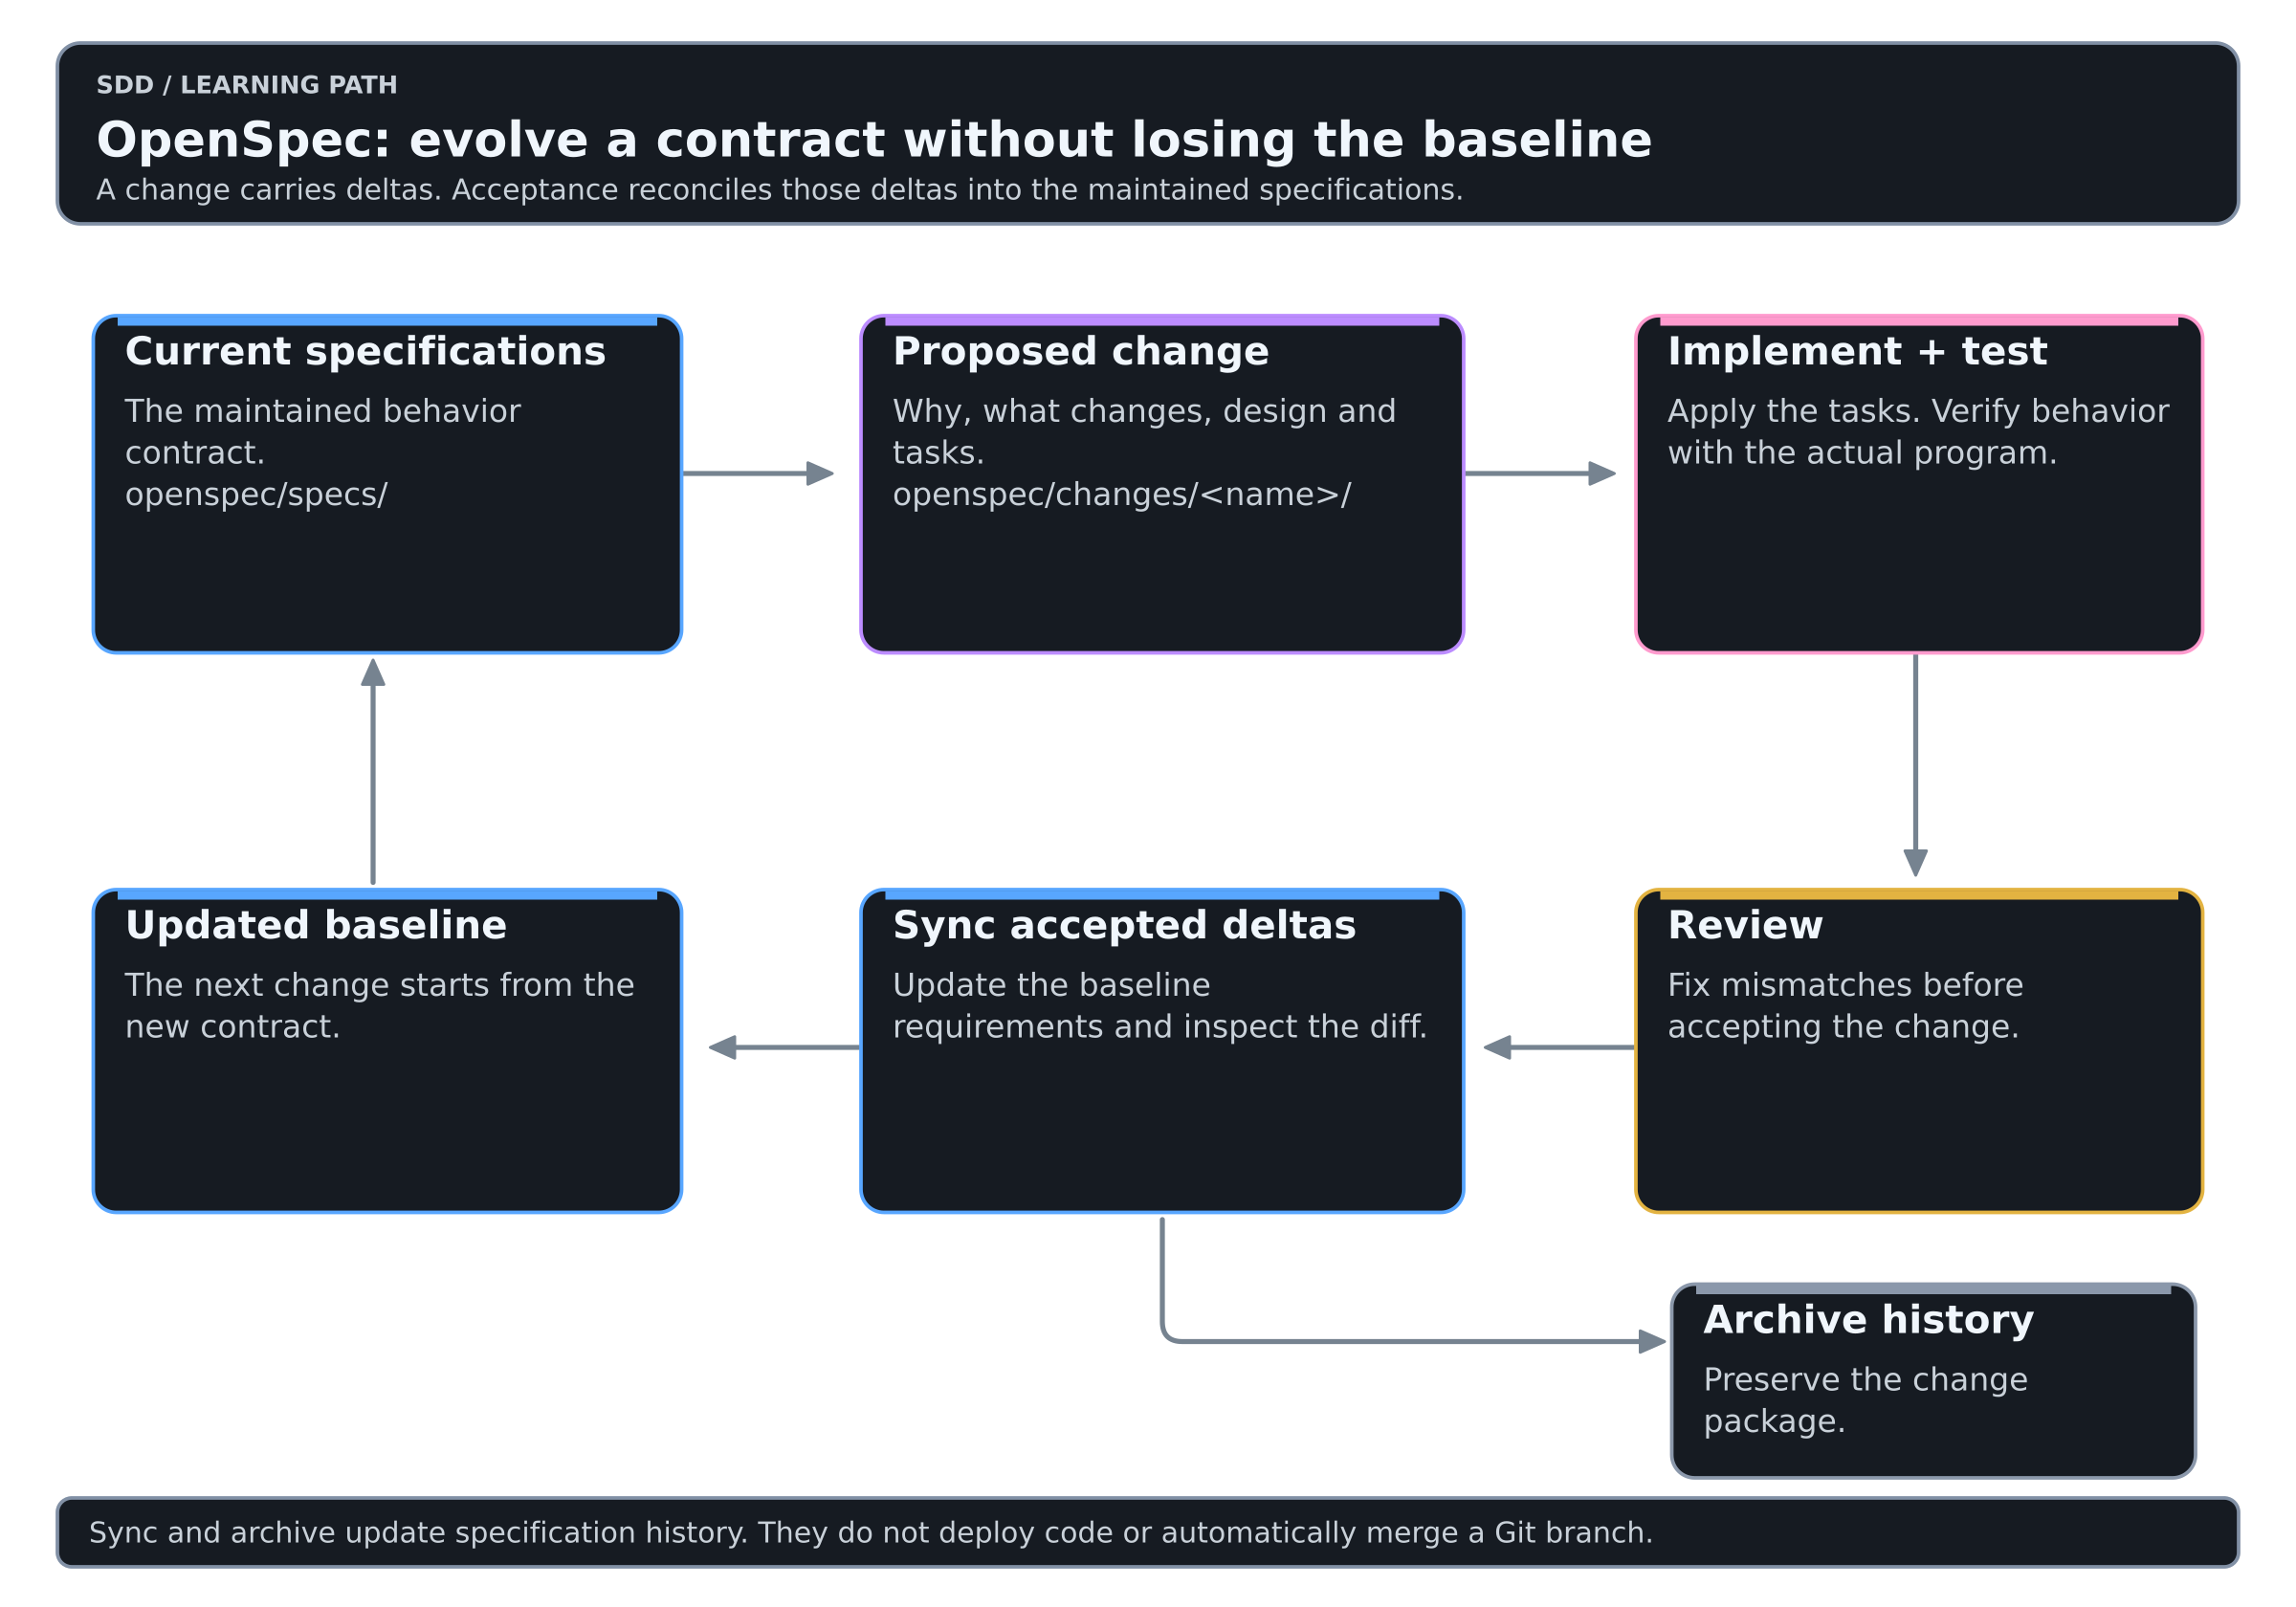
Colors mean the same thing in every diagram of this Learning: see the color key.
The arrows describe the working relationship. They do not mean that a specification update deploys code or merges a Git branch.
The smallest useful workflow
| Step | Where | Purpose |
|---|---|---|
openspec init | Terminal | Configure the repository |
/opsx:explore | Agent chat | Investigate the problem and current code, if needed |
/opsx:propose | Agent chat | Create the change artifacts |
/opsx:apply | Agent chat | Implement the tasks |
| Tests and review | Terminal and human review | Check actual behavior |
/opsx:sync | Agent chat | Reconcile accepted deltas with current specs |
/opsx:archive | Agent chat | Close the change and preserve its history |
The getting-started guide also shows a shorter path that archives after applying. The archive workflow handles specification synchronization when needed; an explicit sync makes that update easier to inspect before closing the change.
What a useful delta looks like
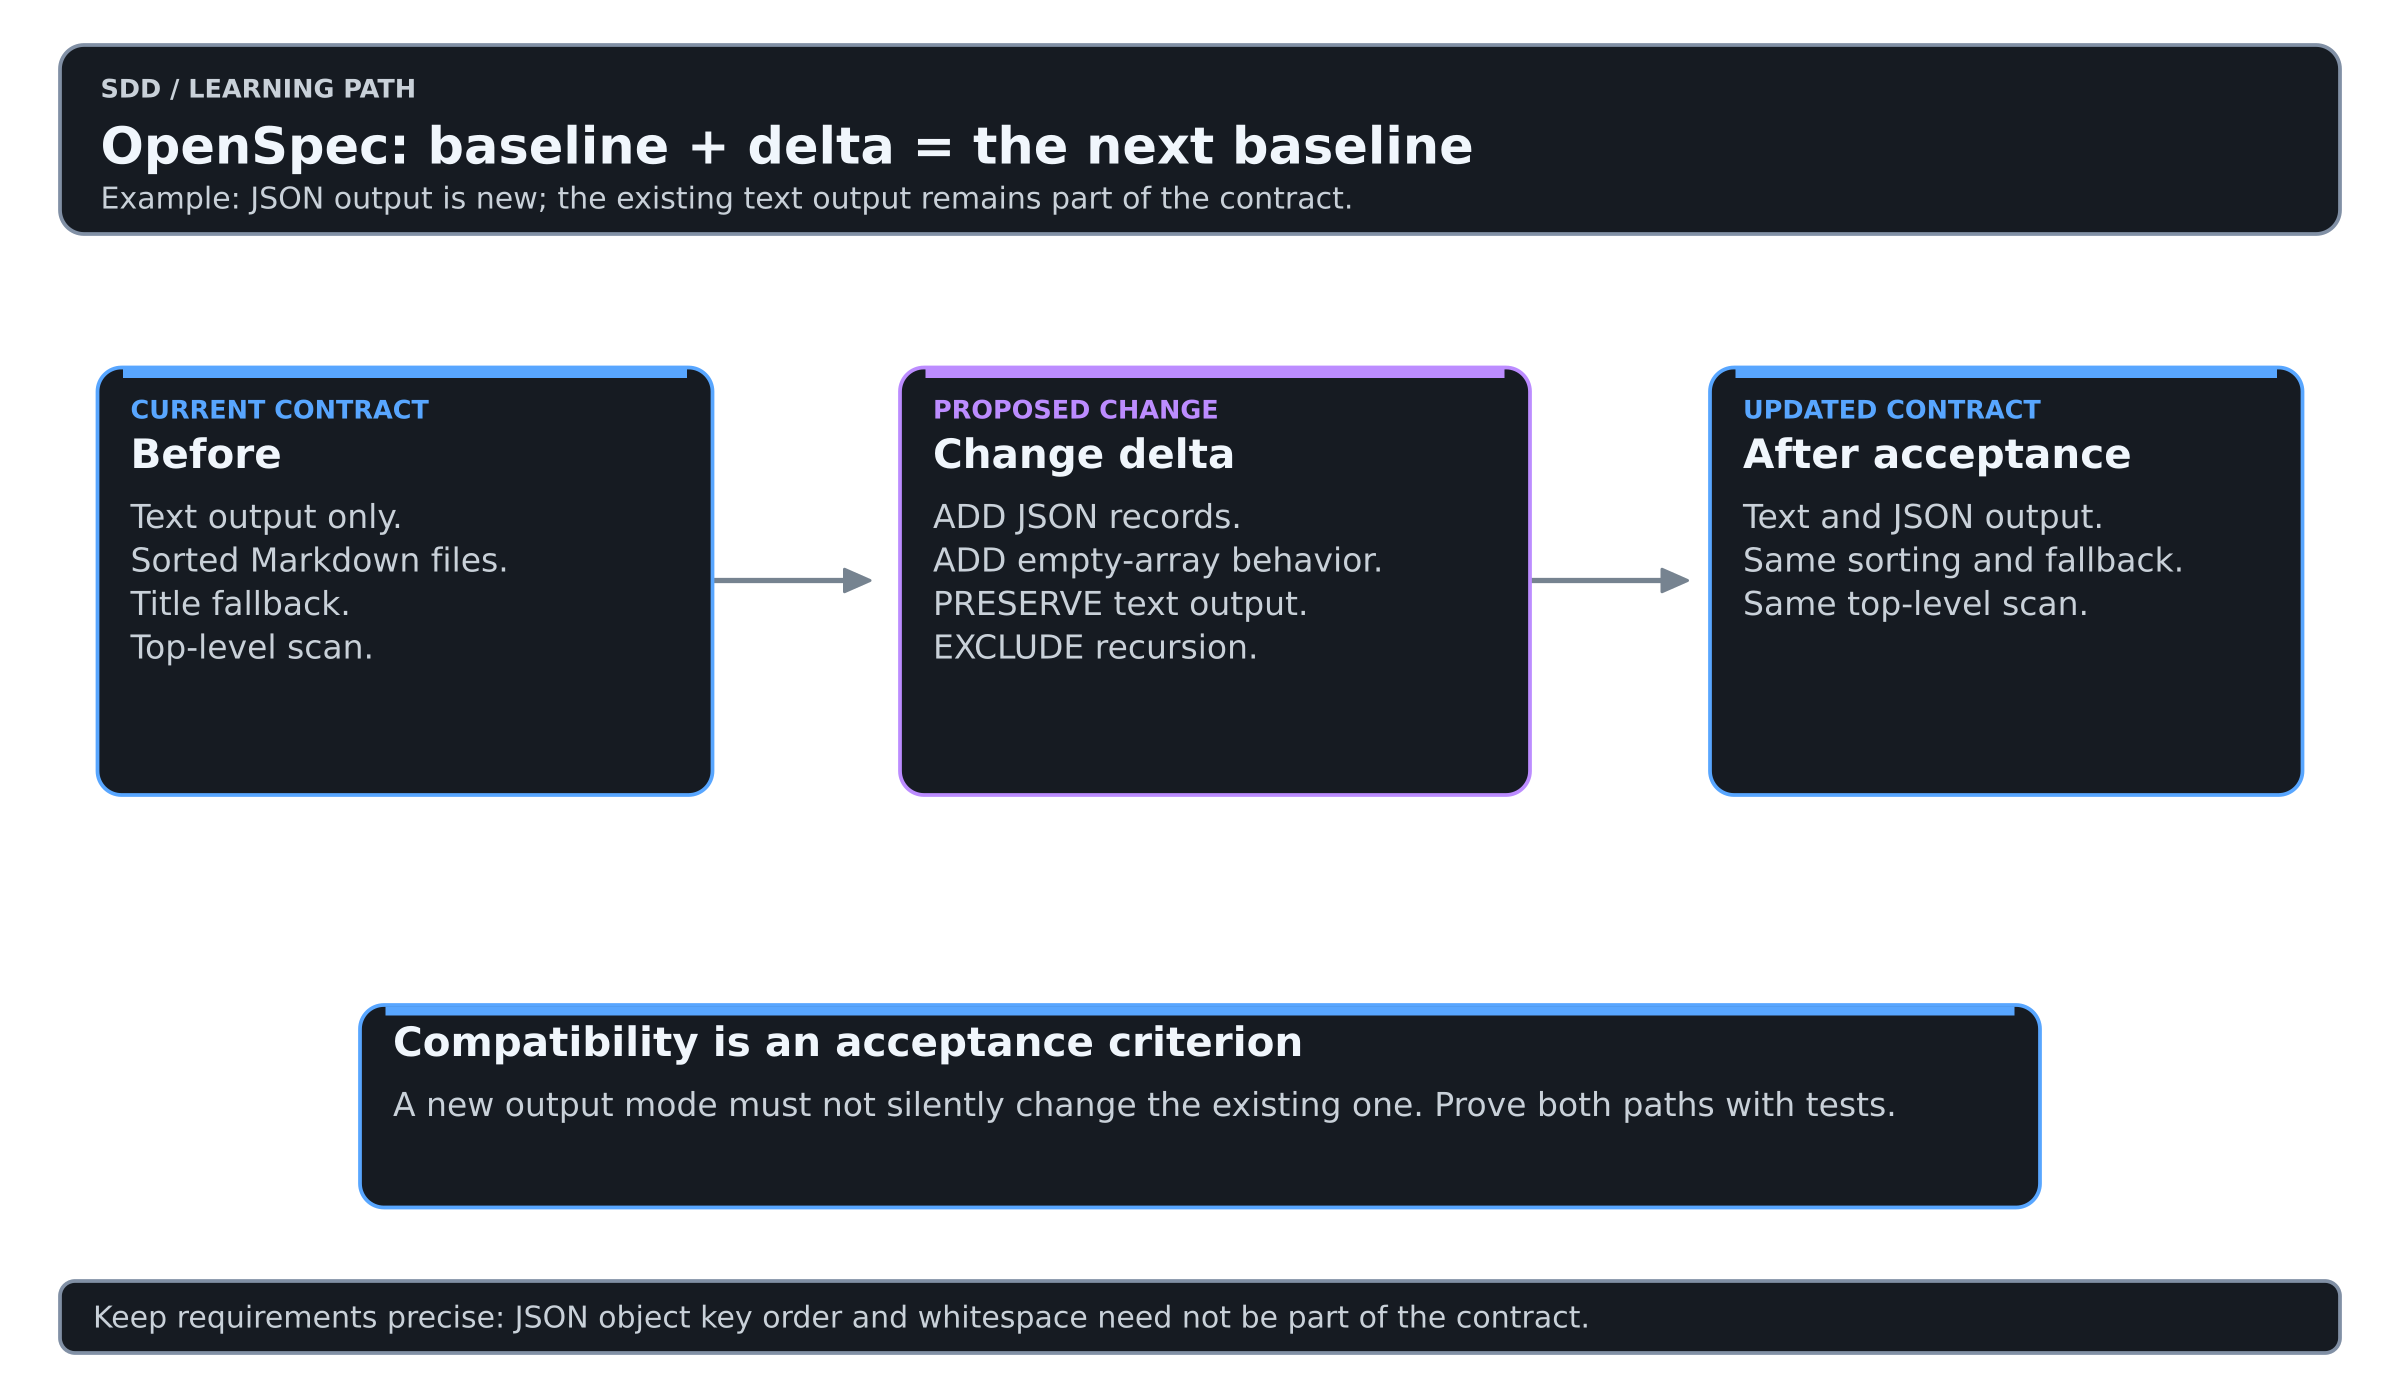
The following is an illustrative fragment for the JSON capability, not a complete generated change package:
## ADDED Requirements

### Requirement: JSON output
The CLI SHALL support --format json without changing default text output.

#### Scenario: Two Markdown documents
- WHEN the user selects JSON for a directory containing alpha.md and beta.md
- THEN stdout contains a JSON array sorted by filename
- AND each object contains exactly the string fields file and title

#### Scenario: Empty directory
- WHEN the user selects JSON for an empty directory
- THEN stdout contains [] and the command exits successfully
The four-hash scenario heading belongs inside the OpenSpec file shown in the code block. It is not a fourth-level heading in this CMS article.
Use ADDED for new requirements. A MODIFIED requirement must describe the complete replacement requirement and agree with the existing baseline entry. Renaming a heading casually can break the relationship the validator needs to check. Let the workflow produce the complete package, then review it.
Starting in an existing project
Do not begin by generating specifications for the entire repository. Choose one capability that is about to change and document its relevant current behavior from code, tests and maintainers' knowledge.
Separate “the code happens to do this” from “we promise this behavior”. If an existing defect is accidentally promoted into the specification, later agents may preserve it as a requirement.
For example, the starter CLI intentionally scans only the top directory. JSON output should not silently introduce recursive discovery. That boundary belongs in the change review even though it is not the new feature.
Common mistakes
| Instead of | Prefer |
|---|---|
| Treating the proposal as the entire specification | Review the delta requirements and scenarios |
| Rewriting every baseline spec for a small change | Keep the delta focused |
| Running verify before enabling it | Check the installed profile and generated command catalog |
Treating openspec validate as an application test | Run the project's tests as well |
| Archiving to make the dashboard look complete | Close only after reviewing evidence and specification updates |
| Editing generated tool instructions for project policy | Put project context in its maintained configuration or repository docs |
Practice on the shared lab
The OpenSpec lab route walks levels 2 to 6 of the SDD Learning with OpenSpec. It is the same small change every track uses: add JSON output to a tiny CLI and keep its text output unchanged.
A pragmatic adoption path
- Pick one small change to an existing codebase.
- Write down what must remain compatible.
- Review the proposal and deltas before applying them.
- Archive only after checking the baseline specification diff.
- Start the next change in a fresh session and see whether the maintained specs save explanation.
My recommendation: choose OpenSpec when your main problem is evolving an existing system without losing the record of what it is supposed to do.